Precision Bends, Seamless Results- Mastering Duct Forming Techniques
- By:Metmac
- 2024-05-07
- 192
Introduction
The art of duct forming is an essential skill in the field of HVAC (heating, ventilation, and air conditioning). Precision bends and seamless results are crucial for ensuring proper airflow, preventing leaks, and maximizing system efficiency. This in-depth article provides a comprehensive guide to mastering duct forming techniques, empowering HVAC professionals with the knowledge and techniques necessary to achieve superior outcomes.
Understanding Duct Materials
The choice of duct material plays a significant role in the duct forming process. Common materials include:
Galvanized steel: Lightweight, durable, and corrosion-resistant, making it suitable for most applications.
Stainless steel: More corrosion-resistant and durable than galvanized steel, but also more expensive.
Aluminum: Lightweight, corrosion-resistant, and easy to work with, but requires specialized tools and techniques.
Selecting the Right Equipment
The type of duct forming equipment used will depend on the material and the required bends. Essential equipment includes:
Manual benders: Handheld tools for small-radius bends.
Hydraulic benders: Leverage hydraulic power for larger-radius bends.
Die-less benders: Versatile tools that can create a wide range of bends without the need for dies.
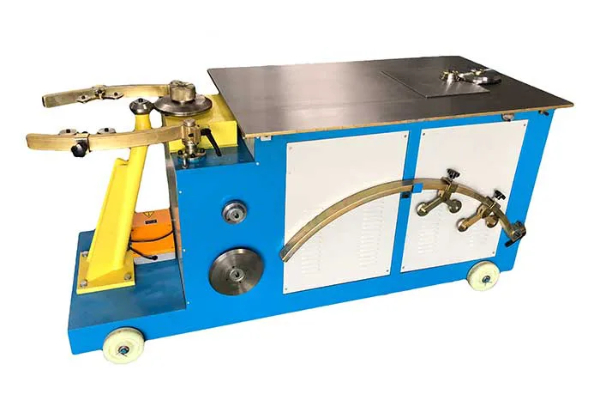
Elbow machines: Specialized machines designed for forming elbows and other complex shapes.
Techniques for Precision Bends
Step 1: Measure and Mark
Measure the desired length and bend radius carefully.
Mark the bend location on the duct using a template or bending compass.
Step 2: Make the Initial Bend
Position the duct in the bender at the marked location.
Gradually apply pressure until the duct reaches the desired bend angle.
Step 3: Adjust the Bend
If necessary, adjust the bender settings or use a hammer and dolly to finesse the bend to the correct angle.
Techniques for Seamless Results
Step 1: Seal the Joints
Use duct tape or mastic to seal the joints between duct sections before forming.
Ensure that the joints are clean and free of debris.
Step 2: Support the Duct
Support the duct throughout the forming process to prevent buckling or warping.
Use clamps, braces, or a worktable to maintain stability.
Step 3: Lubricate the Tools
Apply lubricant to the bender dies and any other contact points to minimize friction and prevent tearing.
Use a silicone-based lubricant specifically designed for duct forming.
Quality Control
Step 1: Inspect the Bends
Check the bends for accuracy, consistency, and absence of deformities.
Use a protractor or bending gauge to verify the bend angle.
Step 2: Seal the Joints
Ensure that all joints are properly sealed and airtight.
Test the system for leaks using a smoke or pressure test.
Step 3: Protect the Duct
Cover the duct with insulation or paint to protect it from external factors such as corrosion or damage.
-

Iron Sheet Laser Cutting Machine: Unmatched Precision for Demanding Fabrication with METMAC
2026/01/06 -

Precision Metal Cutting Machine: The Engine of Modern Manufacturing, Powered by METMAC
2026/01/06 -

Sheet Metal CNC Laser Cutting Machine: Precision Redefined with METMAC Technology
2026/01/06 -

Sheet Metal Press Brake for Sale: Find Your Precision Bending Solution with METMAC
2026/01/06
-

Advanced Sheet Metal Rolling, Laser Cutting, and Folding Machines for Precision Fabrication
2025/10/31 -

High-Performance Sheet Metal Bending and Cutting Machines for Modern Fabrication
2025/10/31 -

High-Quality Sheet Metal Equipment for Sale: Efficient Solutions for Modern Manufacturing
2025/10/31 -

High-Performance Sheet Metal Equipment for Sale: Forming and Shearing Solutions for Modern Fabrication
2025/10/22
-
Integrating Automation with Rectangular Duct Machines for Enhanced Productivity
2024/05/11 -
Metal Shear Machines- Essential Tools for Precision Metal Cutting
2024/05/11 -
Understanding the Role and Function of Steel Strip Slitting Machines
2024/05/11 -
Maintenance Tips for Longevity of HVAC Duct Machines
2024/05/11
-
A Guide to the Latest Innovations in Sheet Metal Folding Machines
2024/11/29 -
Key Features to Consider When Investing in a Sheet Metal Folding Machine
2024/11/28 -
Enhancing Precision with Advanced Sheet Metal Folding Machines
2024/11/27 -
How to Choose the Right Sheet Metal Folding Machine for Your Workshop
2024/11/26

