Time-Saving Tips & Tricks- Mastering Duct Rolling Techniques
- By:Metmac
- 2024-05-07
- 209
In the fast-paced world of HVAC, time is of the essence. Contractors are constantly looking for ways to streamline their processes and increase their efficiency. One area where significant time savings can be achieved is in duct rolling techniques. This article will provide a comprehensive guide to mastering duct rolling techniques, offering practical tips and tricks that can help contractors save time and improve their productivity.
Planning and Preparation
Proper planning and preparation can go a long way in saving time during the duct rolling process. Before starting, ensure you have all the necessary tools and materials on hand. This includes a duct roller, measuring tape, snips, and a crimper. Additionally, take the time to familiarize yourself with the ductwork layout and make any necessary notes or markings.
Efficient Duct Layout
Optimizing the duct layout can significantly reduce the time spent on rolling. Consider the following tips:
– Plan for easy access: Place the ductwork in areas with clear access to tools and materials.
– Minimize bends and elbows: Straight runs are faster to roll than curved sections. Use fewer bends and elbows where possible.
– Utilize fittings: Pre-fabricated fittings, such as elbows and T-joints, can save time compared to rolling custom sections.
Precise Measurement
Accurate measurement is crucial for successful duct rolling. This involves measuring the length and width of each duct section and transferring these measurements to the duct material. Use a measuring tape that is calibrated and hold it taut to ensure precise readings. Additionally, mark the bend lines and other details clearly for easy reference during rolling.
Rolling Techniques
Mastering duct rolling techniques involves developing a consistent and efficient method. Here are some tips:
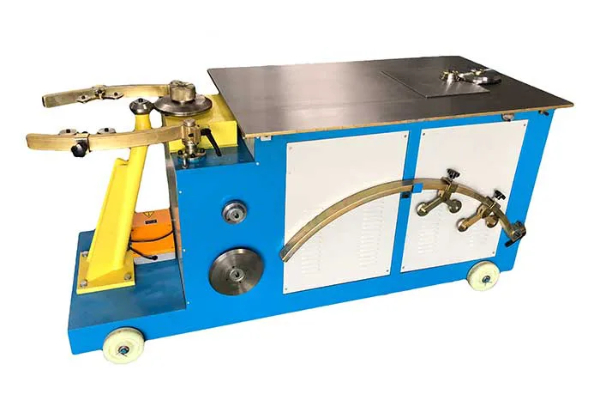
– Use a power roller: A power roller significantly speeds up the rolling process compared to manual rollers.
– Adjust the roller settings: Optimize the roller settings based on the thickness and type of duct material being used.
– Control the rolling speed: Roll the duct material at a moderate speed to avoid tearing or damage.
– Ensure proper overlap: Overlap the edges of the duct material by at least 1 inch to create a strong and airtight seal.
Crimping and Joining
Crimping and joining the duct sections together is an essential step that must be done carefully to prevent leaks. Follow these tips:
– Use a crimper: A crimper provides a quick and secure way to join duct sections.
– Clean the joint edges: Remove any dust or debris from the joint edges before crimping.
– Fold the duct edges: Fold the edges of the duct sections inward by approximately 1/4 inch to create a lip.
– Crimp the joints: Insert the duct sections into the crimper and apply even pressure to create a tight seal.
Conclusion
Mastering duct rolling techniques is a valuable skill that can save contractors significant time and improve their productivity. By implementing the tips and tricks outlined in this article, contractors can streamline the duct rolling process, reduce errors, and ensure high-quality results. Remember, practice makes perfect, so don’t be discouraged if you don’t get it right the first time. With consistent effort and attention to detail, you can become an expert at duct rolling and set yourself apart in the competitive HVAC industry.
-
Mastering Form and Force: A Guide to Modern Metal Plate Bending Machines
2025/12/16 -
Demystifying Sheet Metal Laser Cutting Machine Price: The METMAC Value Perspective
2025/12/16 -
Metal Sheet Machinery: The Engine of Modern Fabrication and the METMAC Advantage
2025/12/16 -
Beyond the Bend: The Power and Precision of the Modern Sheet Profile Machine
2025/12/16
-
Advanced Sheet Metal Rolling, Laser Cutting, and Folding Machines for Precision Fabrication
2025/10/31 -
High-Performance Sheet Metal Bending and Cutting Machines for Modern Fabrication
2025/10/31 -
High-Quality Sheet Metal Equipment for Sale: Efficient Solutions for Modern Manufacturing
2025/10/31 -
High-Performance Sheet Metal Equipment for Sale: Forming and Shearing Solutions for Modern Fabrication
2025/10/22
-
Understanding the Role and Function of Steel Strip Slitting Machines
2024/05/11 -
Maintenance Tips for Longevity of HVAC Duct Machines
2024/05/11 -
Innovations in Steel Strip Slitting Machine Design and Technology
2024/05/11 -
Improving Accuracy in Metal Fabrication with Laser Metal Shear Machines
2024/05/11
-
A Guide to the Latest Innovations in Sheet Metal Folding Machines
2024/11/29 -
Key Features to Consider When Investing in a Sheet Metal Folding Machine
2024/11/28 -
Enhancing Precision with Advanced Sheet Metal Folding Machines
2024/11/27 -
How to Choose the Right Sheet Metal Folding Machine for Your Workshop
2024/11/26


